Nvidia Pascal UE4 Ray Tracing

Earlier this week I posted some quick test images of a past personal project with ray tracing enabled in Unreal 4.22. Today I wanted to share some before and after images.  I've got some comparison gifs and new screenshots taken at 3440x1440. Please note, this was all completed on a Pascal series GTX 1070ti.  Meaning I did not have the support of the new RTX cores and my results should not be indicative of actual RTX powered raytracing in Unreal Engine 4.22. 

*It seems art station down scales the resolution of my 3440x1440 image uploads. If anyone is interested in the full resolution images please let me know in the comments below.


Setting up Ray Tracing in Unreal Engine 4.22

Raytracing in Unreal Engine 4.22 on a non RTX GPU requires Windows 10 version 1809 and Nvidia Geforce drivers 425.31.  To verify what version of windows 10 you have installed hit the windows key and type "about your pc" then hit enter. This will bring up a window where you can verify your OS version in the "Windows Specifications" section.

Assuming you have Unreal Engine 4.22 installed, next you want to create a shortcut of the editor.exe and add the following to target path:

 -dx12 -raytracing

The above shortcut will force unreal to launch using windows DXR and supporting raytracing features.  Once in engine you want to make sure ray tracing is enabled in your projects render settings. This will require an editor restart and recompile of all shaders, distance fields, etc.


Once you're back in editor after completing the above steps, you should know raytracing is active when your editor FPS plummets!

Project console variables and further setup

Before continuing, a great ray tracing console variable PDF put together by Epic can be found here. The PDF also goes into further detail on getting ray tracing up and running. 

When I got my scene up and running first thing I noticed was my lighting looking, well, like hot garbage.  This is because by default ray traced reflections is enabled, therefore all reflection captures are useless.  Once I deleted all reflection captures the scene looked recognizable.

Here are the console variables I enabled and tweaked for screen grabbing purposes.  PLEASE NOTE: I tweaked these settings for the soul purpose of saving high resolution screenshots from the editor. I cannot attest to how these settings will perform on your rig or scene.  Moreover, I didn't get around to adjusting the denoiser settings.

r.RayTracing.EnableMaterials 1
r.RayTracing.Reflections 1
r.RayTracing.Shadows 1
r.RayTracing.AmbientOcclusion 1
r.RayTracing.GlobalIllumination 1
r.RayTracing.GlobalIllumination.SamplesPerPixel 2
r.RayTracing.GlobalIllumination.MaxBounces 2
r.RayTracing.GlobalIllumination.EvalSkyLight 1
r.RayTracing.Reflections.MaxBounces 2
r.GlobalIllumination.Denoiser.ReconstructionSamples 64
r.GlobalIllumination.Denoiser.HistoryConvolution.SampleCount 64

PRO TIP: 

Scene navigation a pain in the ass after getting ray tracing sorted? Set your editor window view mode to Ray Tracing Debug>BaseColor. Enjoy high frame rates for navigating around your scene! Swap back to lit when ready for ray traced goodness.

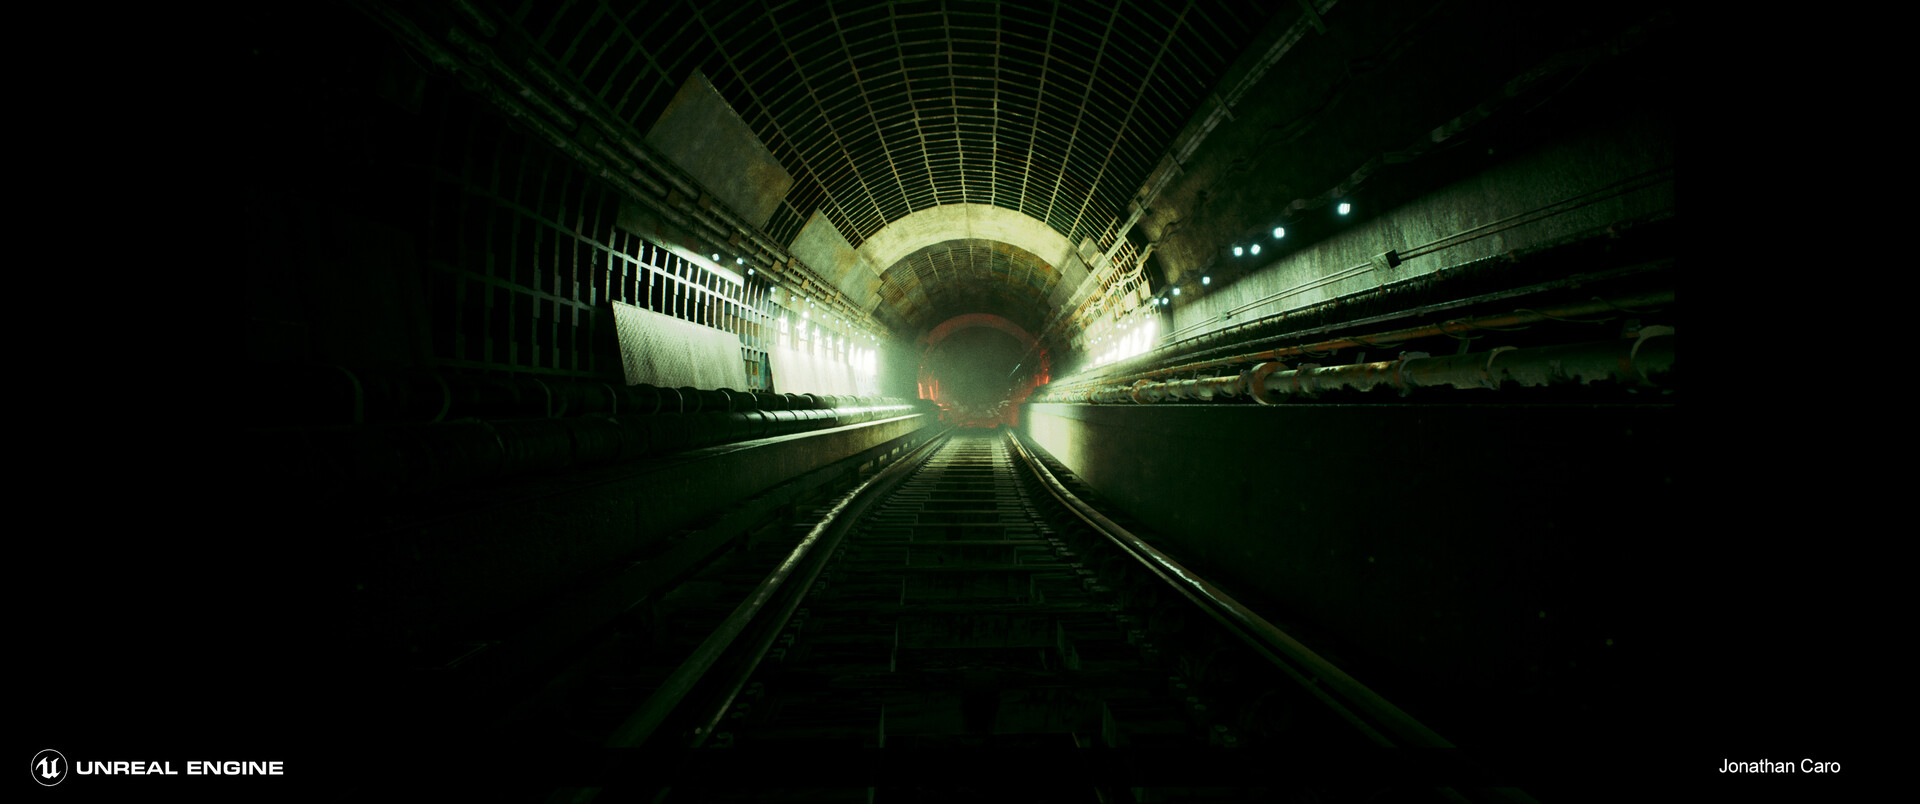
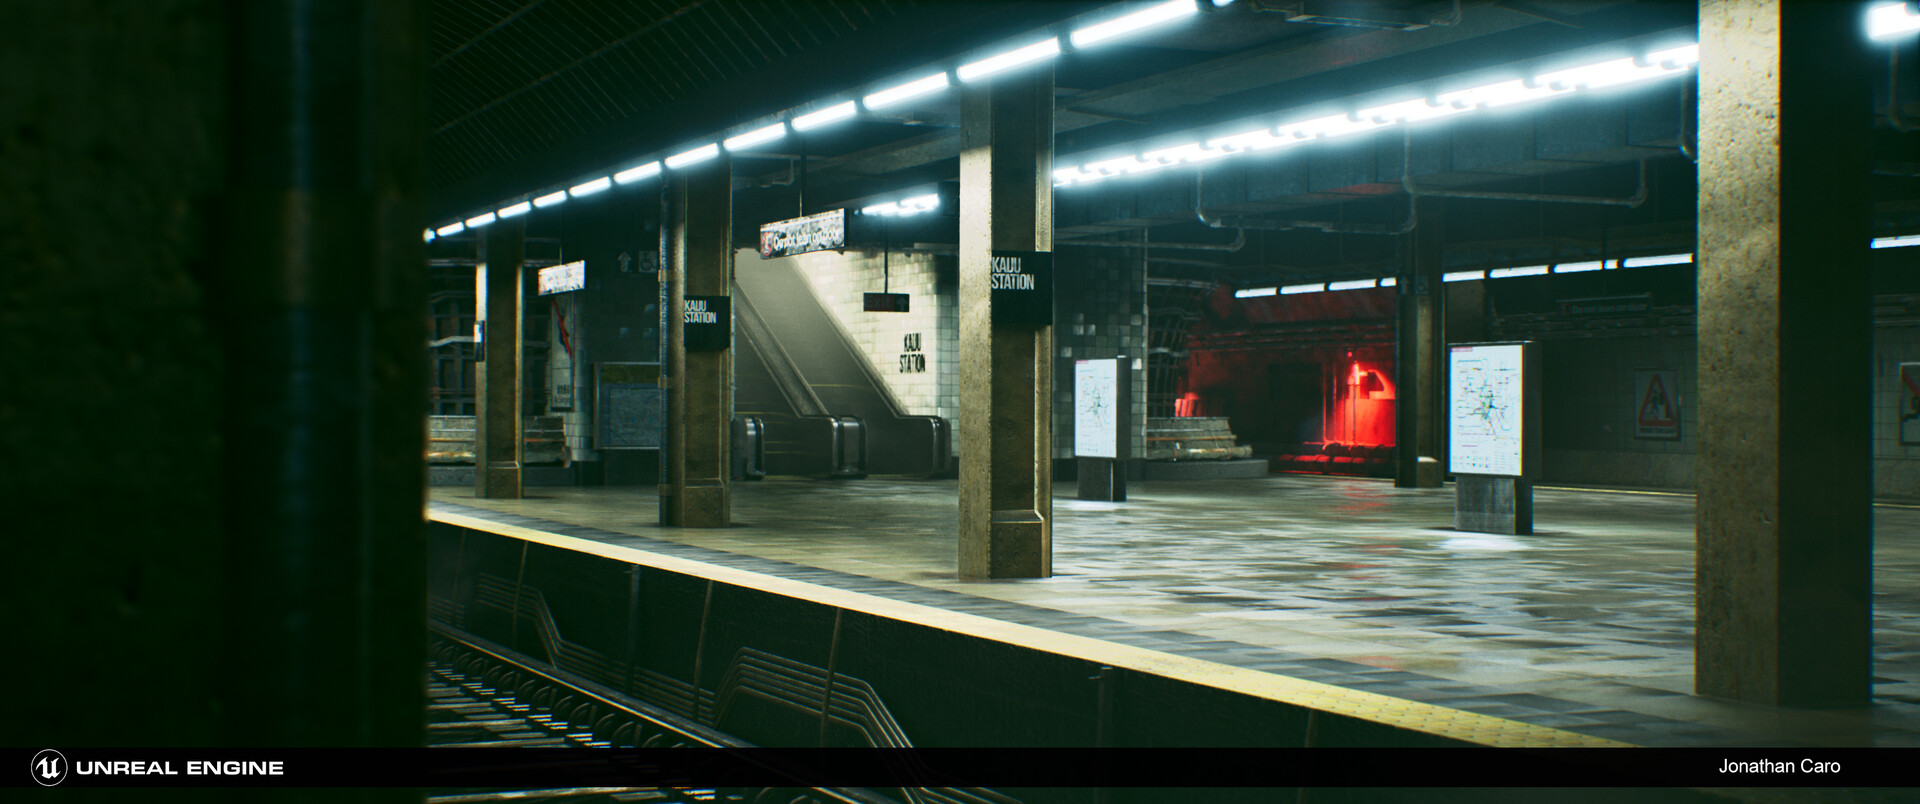
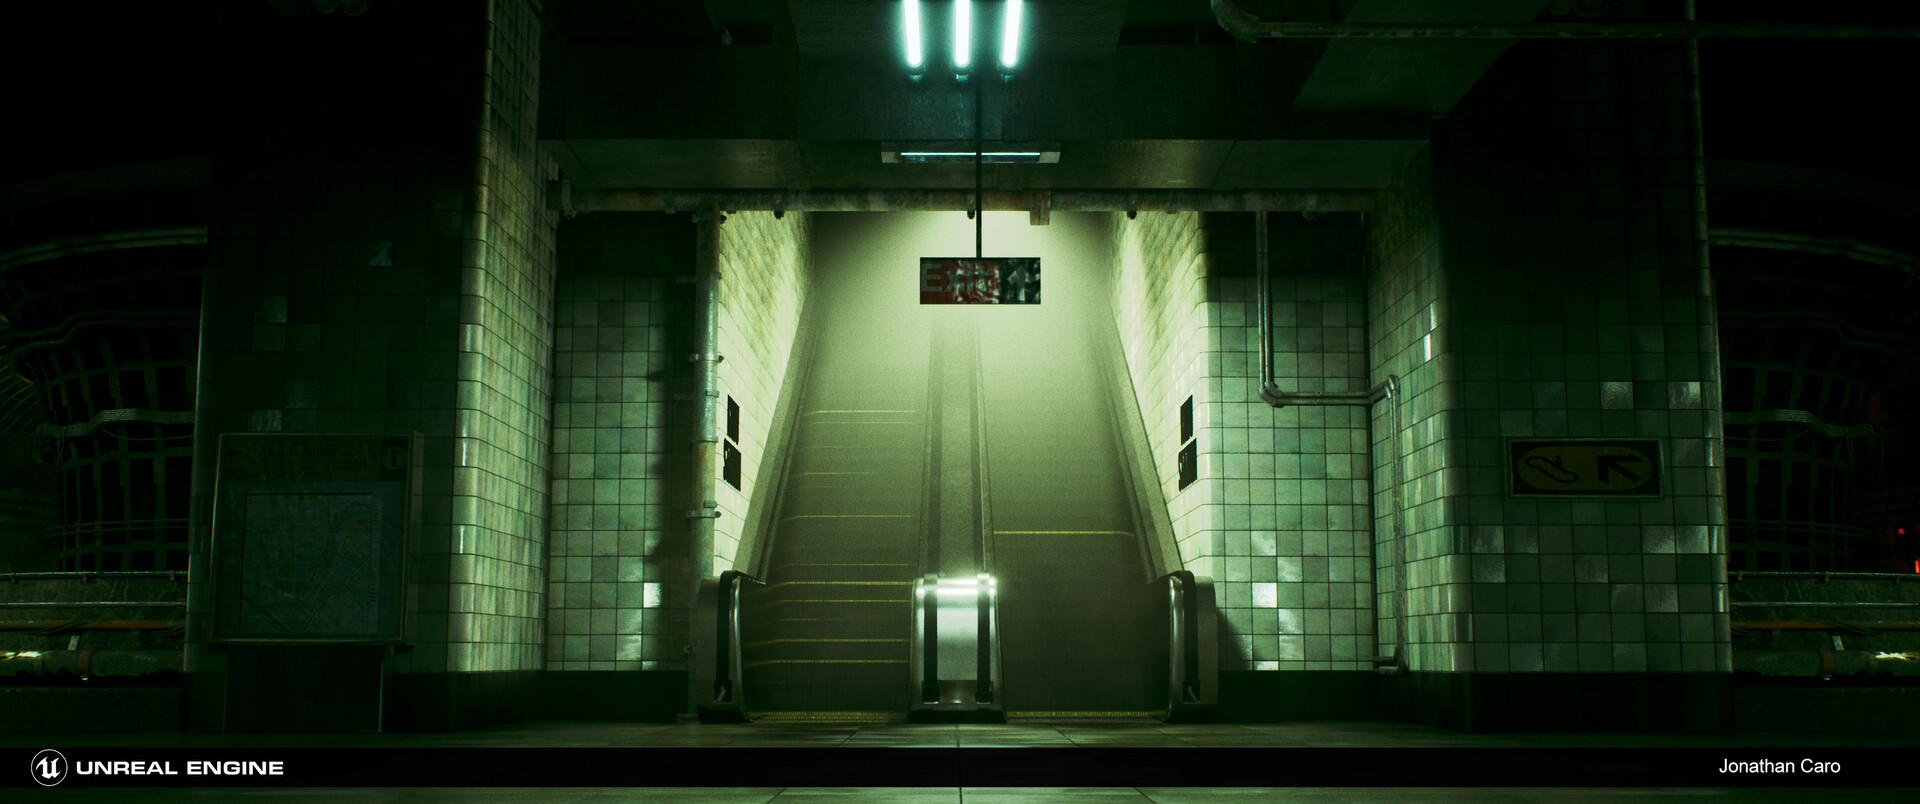
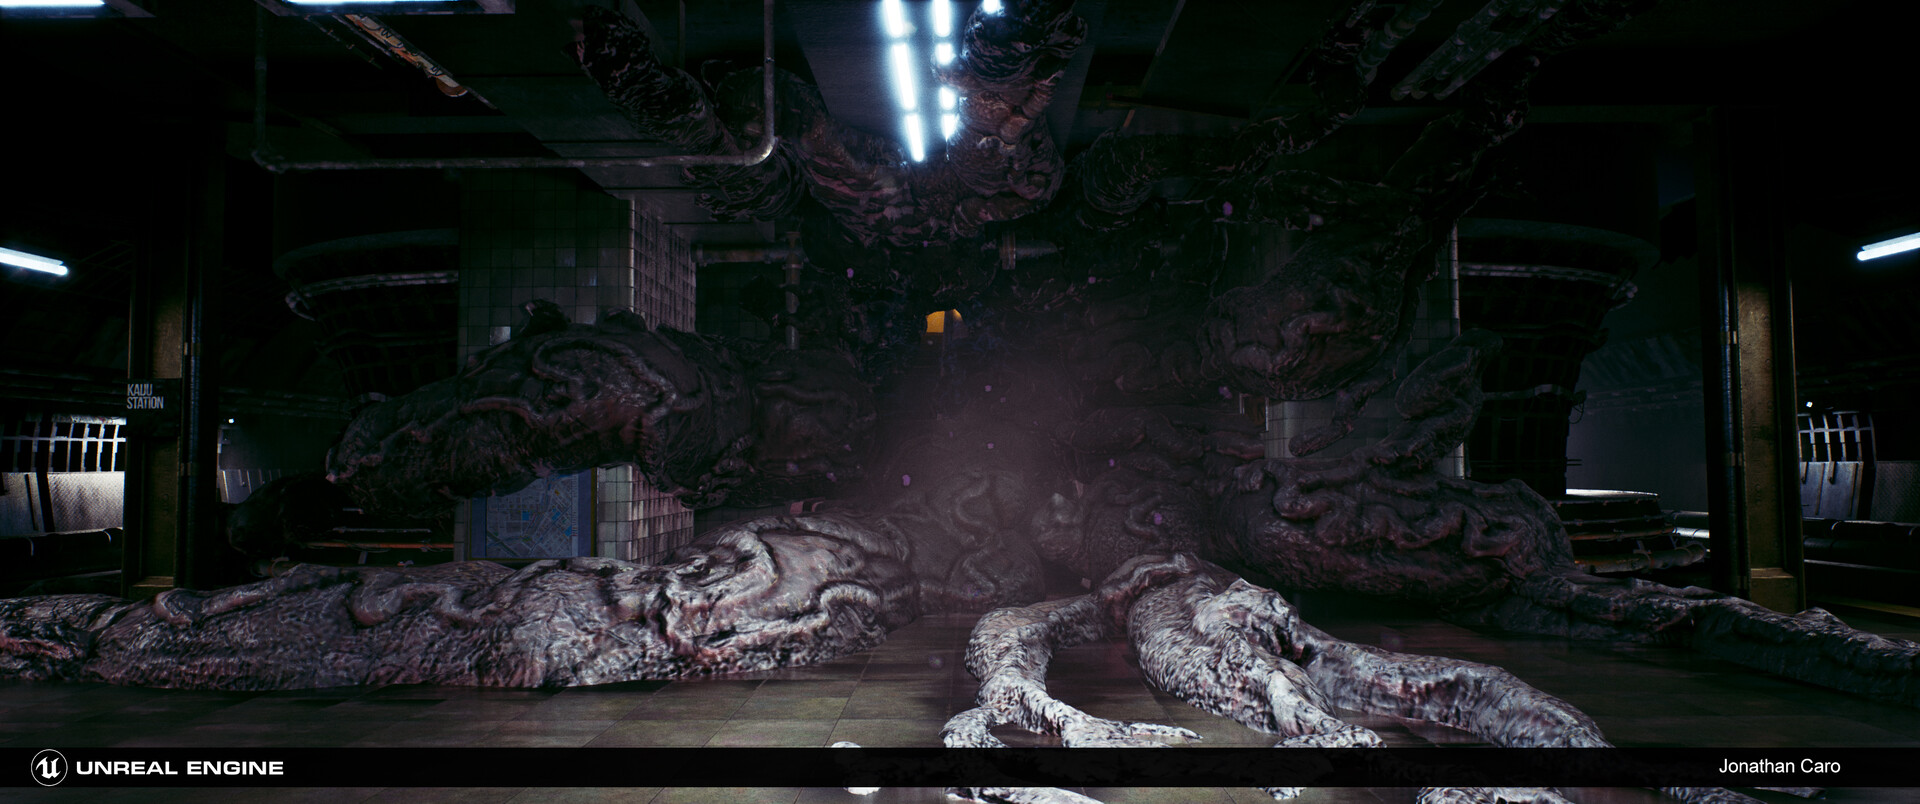
Ray Traced Screenshots & Comparisons

Most noticible to me were the more accurate reflections, secondary light bounce thanks to global illumination, and incredible contact shadows thanks to ray traced ambient occlusion.


In closing

I'd love to see how this performs on an RTX card some day.  Additionally I need to spend more time to figure out how to tweak the denoising settings.  My next personal project currently in progress will go through a similar comparison between ray tracing and non ray tracing setups.

Please feel free to ask questions in the comments down below, thanks for reading.

-Jon


Report

Global Game Jam 2019: Roomies

48 Hours to Make a Game

I had the pleasure of joining 4 other co-workers during this years Global Game Jam at playcrafting NYC. As 3D artist of Roomies I was responsible for all mesh creation, unwrapping, PBR texturing of the ground tile, and scene lighting within a 48 hour period. As Project manager I got so say NO to a bunch of 'asks' and I stood behind people with a foreboding stare during the last 30 min of build testing.  Today I'd like to share some behind the scenes info on building the 3D content for Roomies.


Reference & Inspiration

The second day of the jam, when the Roomies team hunkered down at one of our developers house.  Kevin Blum and I quickly came up with an artistic direction that we believed was achievable through the scope of the 48 hour game jam, and would create a standout personality for our game.  Kevin had came equipped that morning with a trove of imagery that would help guide how our game would look.  


Most importantly we wanted to nail the initial read of the scene and character movement on the level. Using a low poly mesh, and clean textures were the goal from the get go.

3D Modeling & Modular Design

Creating the character mesh and unwrapping the character was top priority early Saturday afternoon. Two team members were reliant on that asset completion. One for creating base color textures, the other for creating an animation system using real-time mesh deformation.


The modular system was set up to guarantee that the complete environment and props adhered to a 1meter x 1 meter tile system.  Additionally, no props would be taller then a wall, of which had a max height of 1.5 meters.  With all mesh transforms at world zero and each front of mesh facing the Z axis, developers could easily construct a level grid manager without having to second guess perfect on grid movement.


While modeling the props I understood I wouldn't have time to do any bakedowns, therefore I decided to chamfer edges in order to define a soft silhouette for props.  As a general rule of thumb, never (if possible) chamfer/bevel edges before unwrapping your mesh.  Chamfer edges made after unwrapping keeps UV boundaries intact! Another simple modification made to the final mesh was adding a spherify modifier. This helped accentuate the scale and shape to build on a cute/fun look.

Lighting

With having only an hour devoted to lighting on the final day before submission, efficiency and cleanliness in GI was of upmost priority.  Luckily I new I wouldn't be generating any lightmaps. As all meshes would be considered dynamic.  With a temp level layout loaded into editor I was able to pick 3 colors of a gradient as the source for ambient scene lighting. These colors coincided with the pastels Kevin Blum used for painting the base color textures.  Additionally I wanted to approximate global illumination with soft area lights, so setting up a light probe network was a must have.


With the lighting system in place, I spent the remainder of my hour setting up an ACES tonemapper with ambient occlusion and bloom as my post processes.  The grade was very simple, just a slight uptick to exposure and contrast and very slightly bringing the game color range towards blue.  Additionally I tinted the ambient occlusion towards blue/purple (#5C7ADB) to introduce more color to ambient shadows. Using monument valleys soft GI bounces and colored shadows as my main inspiration for lighting, helped drive home the overall aesthetic of what we created.

Once the team got to see the example level washed in light everyone had this moment of relief, an almost euphoric "wow we actually did it" moment as the game looked like what we had envisioned.

I'd love to do some experiments with real-time lights on the character or objective props, and create a full set of PBR textures for all assets in the future.

This was a great and noble undertaking by a talented team of 5 and I am very happy I got a chance to partake and try a style that is very different from what I usually create in 3D.  Feel free to give it a download and play the prototype for yourself! Click the image below to grab a windows or mac executable from itch.io


Thanks for reading, and please feel free to ask any questions relating to the 3D content in the comments.

-Jon

Report

Kaiju Station on itch.io

My latest personal project is publicly available as an interactive demo for the first time!


^^^ Click the above image and it will take you the itch.io page where you can download the game and explore the scene.

This project was my first go at putting a scene together in Unreal.  Any and all feedback is greatly appreciated, especially in regards to packing an executable to share among the populous. I.E having varying levels of graphics tiers, project settings that help with performance etc.


 I've only seen the scene running on a handful of systems, so performance will vary. I can hit a stable 1080p120fps with:


i7 8700
16 GB DDR4-2132
960 PRO M.2 ssd
GTX 1070ti

I'ts been played at 1080p60fps with an i7-4790K and GTX 960 as well.

Be sure to let me know what you think if you give it a download!

Report

Figuring out Photogrammetry

Research and Development

The need for establishing a workflow

----

Generating 3D data from a 2D image set has always seemed like black magic to me, transcending dimensions, a couple co-workers and I decided it was time to figure out how to grasp this process and utilize it for our needs both professionally and personally.

I came across a great YouTube video that would become the foundation for establishing a workflow with photogrammetry and used it as production guideline.  

Firstly, we needed to use a photogrammetric processing  suite that would allow full function and exporting.  Secondly, software was required to instantly remesh and downpoly; it was understood between my co-workers and I that aiming to use existing software our company owns and trial versions of new software would be the most realistic approach.  3Dsmax and flatiron would be used for quick unwrapping and normal plus albedo map baking onto the downpoly'ed asset.  Lastly, Quixel suite would be used for continued texture baking, and hand authored texture painting to grantee a PBR ready pipeline.

The final list of software:

  1. Agisoft Photo Scan
  2. 3D Studio Max 2016 (Office is a couple years behind)
  3. Instant Meshes
  4. Flatiron
  5. Quixel Suite 2

Ecuador Mask Process


----

For this hand sculpted Ecuadorian mask, All Things Media's video department supervisor, Angel Delgado, set up a photogrammetry capture station that consists of a Sony A7s, 3 LED light boxes, a hand spun marble base, and two white boards used as a backdrop and light bounce.

After capturing 59 photos, Agisoft was up to bat for point cloud and mesh creation.  A translucent water bottle was used to prop the mask up, allowing us to capture great side views without having Agisoft register the prop as point data.  Agisoft was able to generate 23,373 points to process a mesh from.


-Agisoft screen-grab showing the angle of each photo


Exported from Agisoft as an FBX, the mesh got its transforms reset to its bottom with a rotation of 90 degrees, and the mesh itself was aligned to world zero in 3D Studio Max.  Unneeded data from the highpoly scan result was manually cleaned up in 3DsMax in preparation for downpoly using InstaMeshes.  Take a look at the difference in wireframe below:
 
 - High Poly = 2,095,295 million, Low Poly = 30,596 thousand

3Dstudio max's render to texture feature using scanline rendering, took care of baking the high poly meshe's albedo and normal data onto the low poly UV's unwrapped by Flatiron.  The lowpoly mesh along with baked normal and albedo maps were taken into Quixel Suite's DDO to continue map baking.  Corinne Cook assisted with hand authoring a metalness map and cleanup of artifacts in the low poly mesh.  Here is the PBR material breakdown:

- In order of Left to Right: Albedo, Metalness, AO, Cavity, Normals, Roughness, Albedo


The End Result!

----

The full photogrammetry process resulted in a great asset that holds up in virtual reality!  The below image is a still frame from a mixed reality video created with Unity engine.


Report